Multi-Computing
January 18, 2017
For lack of a better term, I titled this post multi-computing. In computing jargon we have multi-tasking, which refers to doing multiple things on a single computer, and the title of this piece refers to using multiple computers in a generally seamless way to perform work. In the past I've had some limited experience with this, in the use of an old Windows7 machine over RDP (Microsoft Remote Desktop Protocol) from a newer Windows7 computer. Since then my knowledge has expanded quite a bit in this area, and I'd like to lay out some of these details in a single article.
I personally think the advantages of having multiple computing devices are obvious, especially when you have lots of computing work to be done, so I won't belabor that with too much argument. The difficulty comes in moving between the computers with minimum effort. From my experience the best way to do this is using networking, having all your devices on a single network, having a router which is under your control, and using the proper network software and protocols. The networking approach may also require opening firewall ports if individual computers have their own firewall running. The second approach which is quite easy although not as scalable to many computers, is to use a KVM, or Keyboard-Video-Mouse switch. I'll provide some of my experiences and details for each of these approaches.
Networked Multi-Computing
If you use modern hardware, such as a store-bought consumer router, then you probably can adopt this strategy without much knowledge in the area of computer networking. If you hook up a computer to a router, things tend to 'just work' in that IP addresses are assigned automatically and computers are able to discover each other on the LAN (local area network) without any effort on your part. The complications come into play because there are so many different operating platforms, software programs, and network protocols which may be used to connect computers to each other.
Windows to Windows using RDP
The environment most people are familiar with is Microsoft Windows, and the traditional way of networked log-on here is using a protocol called RDP, or Remote Desktop Protocol. The receiving end of that connection has to be running a server, so it has to be set up in a specific way. The connecting end runs the client, and all modern versions of MSWindows come equipped with a RDP client by default, which is located here.
> C:\Windows\System32\mstsc.exe
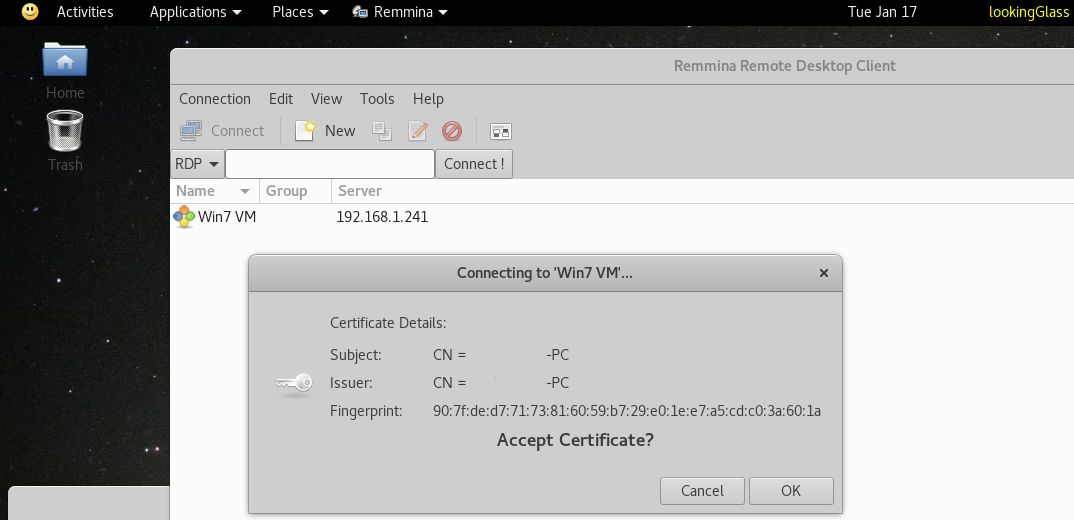
The wiki page gives many more details on RDP. The server end (receiving the connection) must be set up with a user and password (password-less remote connections are not allowed by default, although this can be changed through the group policy editor), the firewall service must be running (the firewall itself can be shut off however), and remote connections must be enabled. Once those three requirements are met a remote RDP connection can be established by the client. Since security certificates are used, you can either set this up manually (copying a file from one computer to another using USB), or allow Windows to do this for you on first connect by agreeing that you 'trust' the connection. For switching between two MSWindows boxes, I definitely think RDP is the best approach, with smooth graphics, cryptographically secure connection, shared clipboard, printers, and redirection of local disk drives. The only exception is when one computer is a virtual machine, in which case I still believe the native VM Windowing system provides a superior user experience. Of course with MSWindows systems you can share folders between computers as well.
Windows to Linux using VNC
On the Linux side you see a protocol called VNC, or Virtual Networked Computing. VNC works to some extent, but does not quite offer the seamless experience and shared resources as you have with RDP. When you think about it, this makes sense. Linux/Unix has traditionally been a command-line computing environment. Most of the core of hardened Linux users and administrators use SSH, or some other text-based shell, to get into a remote system and perform updates. A complete graphical representation of a remote system, and sharing with the local system, was never a high priority.
There are a few drawbacks to using VNC. VNC does not provide any type of transport security (you need to use another program such as SSH to encrypt the stream), while the latest version of RDP offers TLS encryption. Both protocols do provide security certificates and passwords for authentication however. There might be a half dozen or more independent implementations of VNC, while on Windows there really is only one RDP program - the one provided by Microsoft. I've already mentioned that VNC does not allow sharing of clipboard data, files, or virtualization of disk-drives, and this is a huge issue when you're trying to 'multi-compute'. Sharing of clipboard data might work between two Linux boxes (quite honestly I haven't tried it), but between a Windows VNC client and a Linux VNC server, it is sketchy at best, and it almost never works correctly in my experience. Given those drawbacks however, I would say the smoothness in the graphic interface is about comparable with what you find in RDP connections.
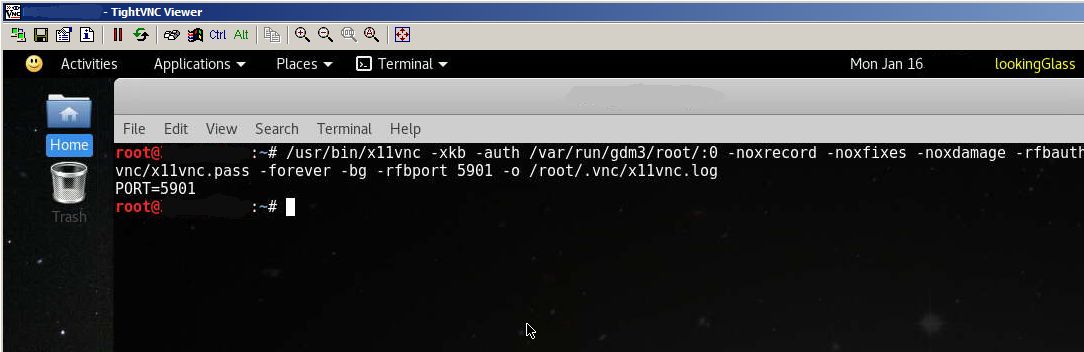
VNC is not overly difficult to set up, and I've seen it used as a fall-back connection on rented hosts for times when you accidentally lock yourself out of the system (such as when you create a firewall rule which locks you out). There are a variety of VNC programs and implementations, so I'll just provide details on the one which I have experience with. I typically start a VNC server called x11vnc on the Linux box, and then in Windows I connect to the Linux box using a VNC client. To install x11vnc, issue the command below.
> apt-get install x11vnc
Before using the VNC server, you need to create a password, with the following commands.
> mkdir ~/.vnc
> /usr/bin/x11vnc -storepasswd ~/.vnc/x11vnc.pass
Assuming I'm the root user on a default Kali Linux installation, this next command starts the VNC server, and incoming connections attach to the currently running root session (with proper authentication of course).
> /usr/bin/x11vnc -xkb -auth /var/run/gdm3/root/:0 -noxrecord -noxfixes -noxdamage -rfbauth /root/.vnc/x11vnc.pass -forever -bg -rfbport 5901 -o /root/.vnc/x11vnc.log
You can confirm the server is up and listening, using the following command.
> netstat -lptu
You can stop the VNC server with this command.
> x11vnc -R stop
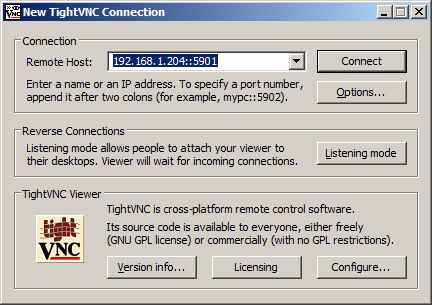
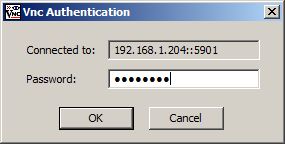
For the Windows VNC client, I use a program called tightvnc. If you install tightvnc, just be aware that it installs and starts a VNC server, so if you don't want that then you need to open your Windows services and stop the VNC server, and possibly disable it also. To connect to the Linux box, start the tightvnc client, enter the Linux machine's IP address, and add the port number which the VNC server is listening on. A window displaying the Linux desktop should appear.
Linux to Windows using RDP
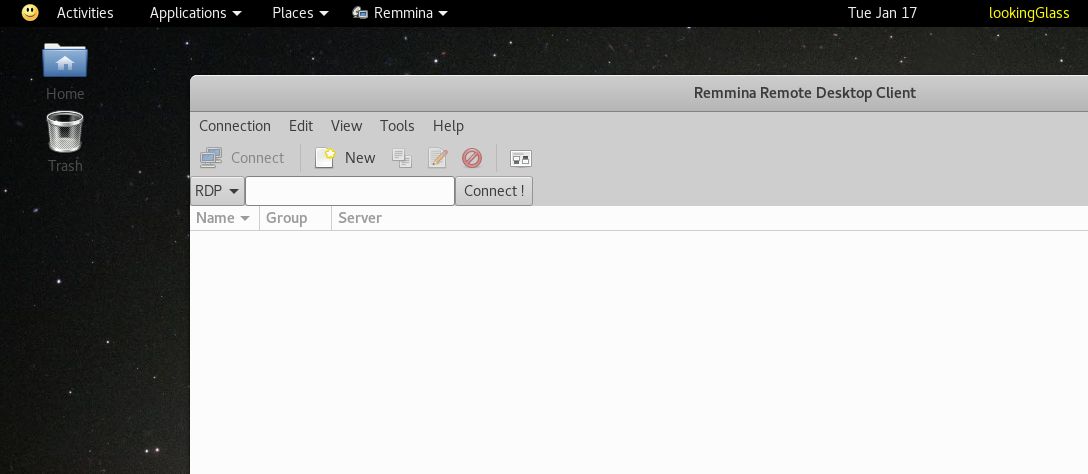
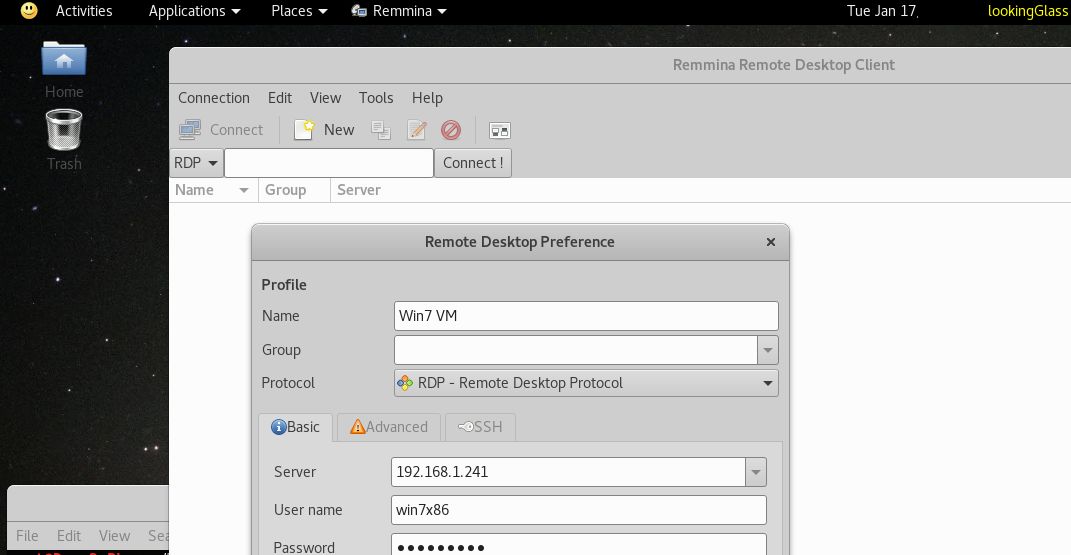
There have been efforts on the Linux side to implement the RDP protocol. One Linux program which I have used, called Remmina, does a commendable job as a RDP client. To my understanding it is available in most Linux distribution repositories, so installation is as simple as this.
> apt-get install remmina
You can start remmina from the command-line like this.
> remmina &
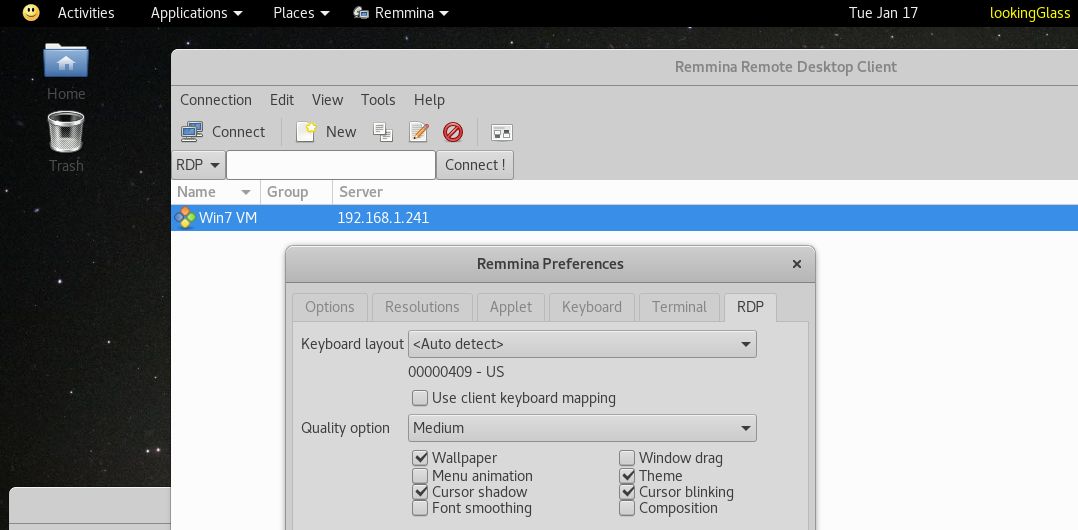
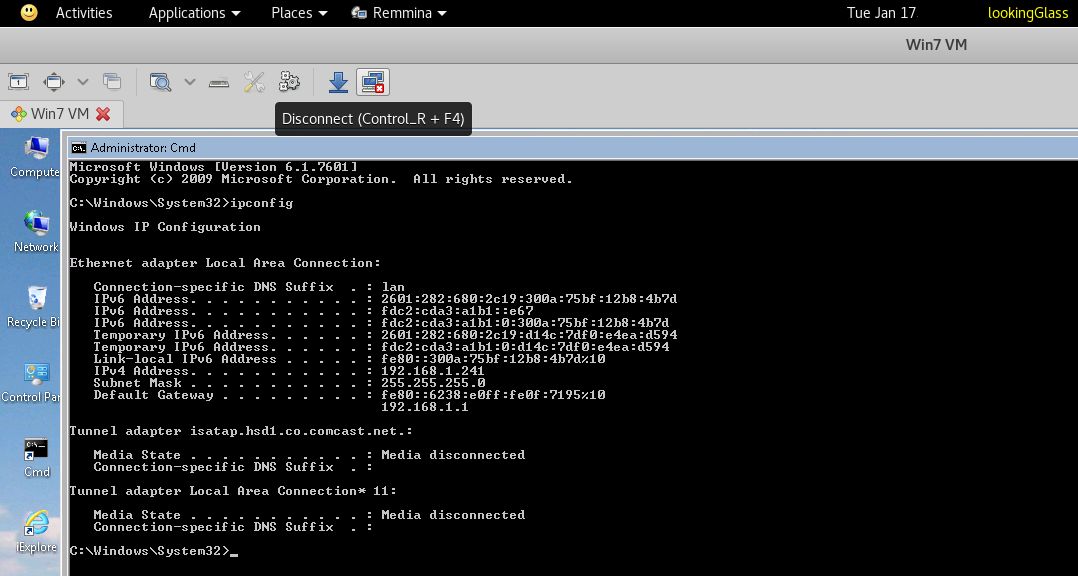
Here is a sequence of clips showing Remmina running on my secondary (Linux) box, and connecting to a Windows7 virtual machine running as guest on my primary Windows7 desktop computer. The Win7 VM has IP address 192.168.1.241 .
Windows to Linux using RDP
Another Linux initiative called XRDP aims to create a RDP server for Linux, but this has been problematic, primarily due to the wide array of desktop environments and session managers available on Linux. XRDP works for some desktops, but not for others. I personally prefer not to jump around too much between different desktop suites, and my preferred environment is the Gnome Shell. Currently XRDP does not work with the Gnome Shell, so I am in a 'wait and see' mode with XRDP. I would love to use it, and when it works it works beautifully (see this blog for numerous working examples), with full resource sharing between local and remote host. XRDP is currently a work in progress, and I fully expect that within a year we will have RDP working between Windows and the Gnome Shell.
Hard-Wired Multi-Computing
Back when I first started adding secondary devices to my personal network, the process involved physically unhooking my keyboard, mouse, and display from one computer, and then hooking them into another computer. If there was reference material I needed from the first computer, then I would have to physically unhook the keyboard, mouse, and display from the second computer, and hook them back into the first computer to get that information. This process of hooking and unhooking, connecting back and forth between computers can become burdensome. It's even worse if the computers are in difficult locations, such as the floor, behind objects, or in cabinets. The ideal solution is to access different machines using networking, but sometimes this isn't possible, such as when you're setting up or configuring a computer which doesn't have network access. The next best solution is to use something called a KVM switch, which stands for Keyboard-Video-Mouse, and it allows you to use a single keyboard, mouse, and display set, and switch among multiple computers.
A couple months ago I picked up a small KVM switch from Amazon. It was my first experience with this kind of device. I did have high hopes, and in this case I wasn't disappointed. The KVM, like the washing-machine or the printing-press, is truly a time and effort saving miracle. The one I purchased was a simple 2-port model, which means I can access two computers from my keyboard, mouse, and display. The exact means of switching is often slightly different from one KVM manufacturer to another, but usually you will have a physical switch on the device itself, as well as a software switch from your keyboard, that is, a key combination which will switch you from one computer to another. Another difference between devices is the type of connector. I have not had good experiences with USB3, so I steered away from that. All the computers I either own or am considering buying have HDMI video connectors, and even though these KVM models were a little more expensive and a little less common, this is the type of KVM switch that I went with.
My Syba 2-Port KVM came equipped with HDMI/USB3 cords (roughly 4ft in length) which attach to two computers, and I supplied the cords for connecting my keyboard, mouse, and display to the KVM device. This particular KVM uses a key combination of the scroll-lock key twice in succession to perform the switch. This was a problem for me initially, since modern keyboards don't have a scroll-lock key. However you can simulate a scroll-lock using the function key + break key. You can search that on Google Images to see the keys I am talking about. Another problem I ran into initially was that while the switch from MSWindows to Linux worked correctly, I was unable to perform the reverse, a switch from Linux back into MSWindows. I learned that my particular Linux distribution, a derivation of Debian, did not create a keyboard mapping for the scroll-lock key. Of course other people have encountered this problem, and after a bit of searching I discovered both a temporary and a permanent fix. The permanent fix, which you can read about here, is a configuration update to create the scroll-lock keyboard mapping, and involves modifying the following file.
/usr/share/X11/xkb/symbols/us
I found that even with this fix, it still requires tapping the scroll-lock key three times in succession, not just twice. I am willing to put up with this minor inconvenience in order to access two full size desktop machines with such ease. Still, the use of a KVM switch does have certain limitations, namely a simple way to share data between the two computers. One mechanism is to use a shared folder, and just copy files to that location, then switch to the other machines and access the files. I'll provide details later for setting up shared folders. This approach adds a bit of convenience but is still a little cumbersome, so I began searching for alternatives. It turns out there really are none, only ad-hoc approaches using various utilities. Again, other people have encountered this same problem, and one reference I encountered here looked quite promising, so I decided to pursue it.
Small utilities in both Linux and MSWindows will intercept various keystrokes and perform actions which you have ascribed to them. The idea I am pursuing here is to assign actions to a certain keystroke to copy clipboard data into a file in the shared folder, and then with another keystroke copy data from the shared file back into clipboard memory, and perform these actions on both the Linux and MSWindows systems, so you're effectively sharing the same data between two computers with a simple keystroke.
Simulating Copy/Paste in MSWindows
The obvious choice for this task in MSWindows is the widely used program AutoHotKey. I have used AutoHotkey for a decade or more, and it really does allow a level of customization which is unprecedented. The download location provides several options, including installers and a no-install zip file (I would choose this, since you don't need an installation). Create a script file with extension .ahk and locate it anywhere - the AutoHotkey.exe directory is a likely spot. Inside your script file, place the following lines, being sure to use the IP address and shared folder name corresponding to your own computer setup.
;;;;;;
;Paste clipboard data to shared folder file
^#v::
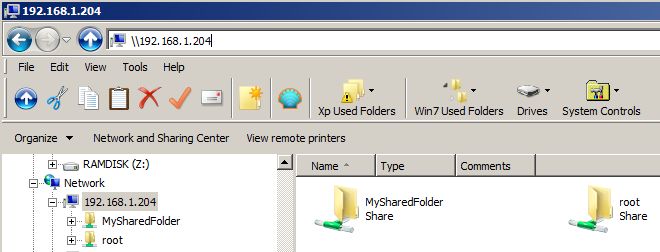
FileDelete, \\192.168.1.204\MySharedFolder\paste
FileAppend, %clipboard%, \\192.168.1.204\MySharedFolder\paste
return
;Copy shared folder file into clipboard
^#c::
FileRead, Clipboard, \\192.168.1.204\MySharedFolder\paste
return
;;;;;;
I have tested the above autohotkey shortcuts, and they work successfully to copy and paste clipboard data to a shared file named 'paste'. Once you have those lines in your script, simply launch AutoHotkey.exe like this.
> C:\PathToAutoHotkey\AutoHotkey.exe C:\PathToScriptFile\MyScript.ahk
If it wasn't clear before, the shortcuts you use here are ctrl-win-c to Copy, and ctrl-win-v to Paste to/from your shared file. More information on AutoHotkey scripting can be found here.
Simulating Copy/Paste in Linux
I identified a couple of Linux utilities which implement the kind of functionality we need here, namely xclip and xbindkeys. The xclip program simply works with the operating system clipboard in the most intuitive fashion. First install it in the usual way.
> apt-get install xclip
Sending data to the clipboard is done like this.
> echo "data to clipboard" | xclip -selection c
Printing data from the clipboard to stdout is done like this.
> xclip -selection clipboard -o
After a brief amount of experimentation, I came up with the following two command sequences to Copy/Paste to the shared file (which is named paste).
Paste from clipboard into the shared file
rm -f /opt/MySharedFolder/paste & echo "$(xclip -selection clipboard -o)" > /opt/MySharedFolder/paste

Copy from shared file into the clipboard
cat /opt/MySharedFolder/paste | xclip -selection c
The xbindkeys program implements keyboard shortcuts. Setup is fairly easy. First install it with your packaging manager.
> apt-get install xbindkeys
Next create a .xbindkeysrc configuration file.
> xbindkeys --defaults > /root/.xbindkeysrc
Finally, use xbindkeys to identify the key-codes for the shortcut you want. Issue the command below, and when the small window pops up, enter the shortcut keys you're trying to achieve. Then it tells you the key-codes (on the third line). I was trying to achieve ctrl+win+c and it returned Control+Mod4 + c.
> xbindkeys -k
Now enter the shortcut into your .xbindkeysrc configuration file.
"gnome-terminal"
  Control+Mod4 + c
Finally, launch xbindkeys.
> xbindkeys
Now if you click ctrl+win+c it will launch a gnome terminal. Of course we're after more than just launching the gnome terminal. To implement the Copy/Paste operations I've been talking about, I enter the following into my .xbindkeysrc file.
#Copy from shared file into the clipboard
"cat /opt/MySharedFolder/paste | xclip -selection c"
  Control+Mod4 + c
#Paste from clipboard into the shared file"
"rm -f /opt/MySharedFolder/paste & echo "$(xclip -selection clipboard -o)" > /opt/MySharedFolder/paste"
  Control+Mod4 + v
Now restart xbindkeys and you're ready to move clipboard data to/from MSWindows and Linux. In fact, put xbindkeys into your .xinitrc file so it starts when your Linux boots up. I have to round out this section by talking about shared folders, since the use of a KVM switch means there probably are no other sharing options available to you. Copying a file into a shared folder may be the only way to transfer information from one computer to another (aside from say using a USB stick).
Shared Folder Setup in Linux
As before, I'll talk about the setups which I am familiar with. For this I start on the Linux system, and set up something called a Samba file share. I install Samba as follows.
> apt-get install samba
Then set a samba password like this (assuming I'm the root user).
> smbpasswd -a root
Next create a directory to be shared. I often use something like /opt/myshare , but using a folder inside your profile directory is a good idea if you're in a multi-user system. Place a reference to this folder in the samba configuration file /etc/samba/smb.conf as follows.
[MySharedFolder]
path = /opt/myshare
valid users = root
read only = no
Then if your startup system is SystemD, issue the following commands to enable and start the service.
> systemctl enable smbd
> systemctl start smbd
Find the Linux IP address using the ifconfig command, and use that IP in Windows Explorer to open the file share (and you may need a username/password for initial access).
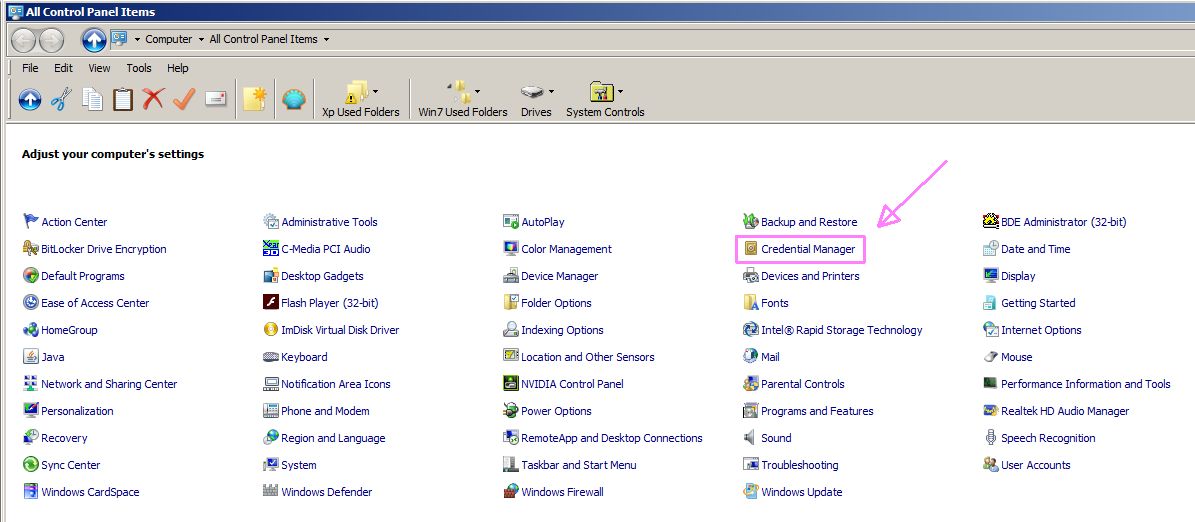
In MSWindows you can add/edit/remove all the credentials used throughout this article using the Credential Manager, which is found in the Control Panel.
Shared Folder Setup in MSWindows
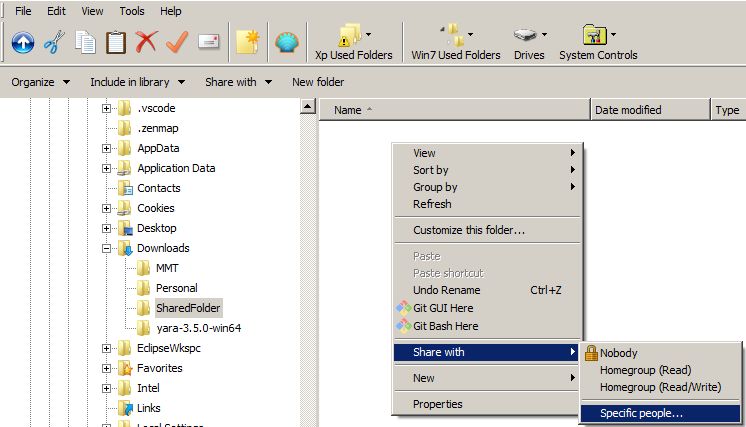
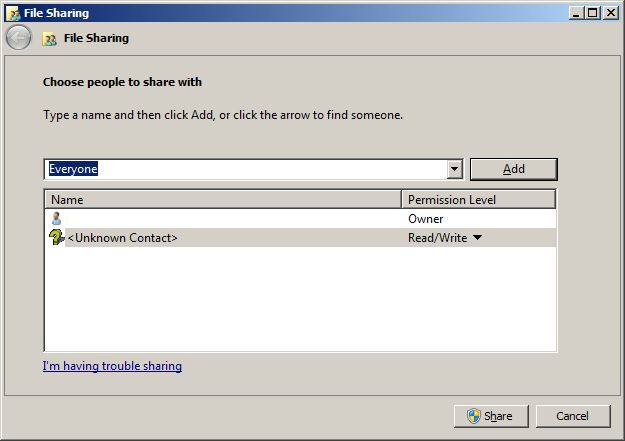
Setting up a shared folder from MSWindows is straightforward as well. Using Windows Explorer, first create a folder for this, then navigate into it, right-click in the display window and from the menu select Share With | Specific People. If it's your own local network, I suppose it's ok to share with Everyone. Then click the Share button. To make this work, ports 139 and 445 have to be open (on any computers involved), and the computer doing the sharing must have a password set up.. similar to how RDP works between Windows boxes. I'm not going to display the connection examples, but they work very much the same in Windows as on Linux, by using the IP address of the machine you're trying to connect to, and then supplying a username/password. In Linux from the Nautilus file manager application, if you open the Network connections area then you should see the Windows share, and to open it just supply a username/password for the MSWindows machine.
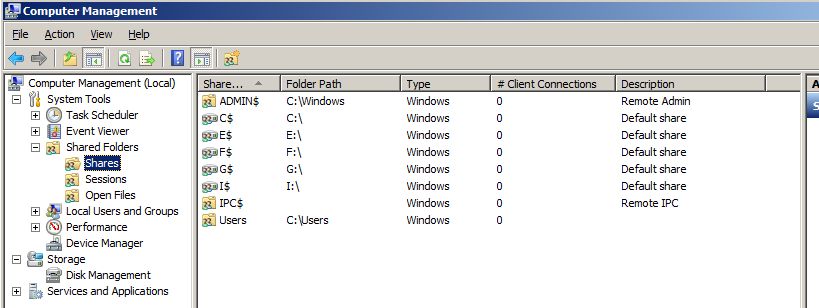
To edit your Windows shared folders, right-click My Computer on your desktop, then select Manage. When the dialog opens, select Shared Folders.
-R. Foreman