Kali Linux OS Backup-Restore
February 6, 2017
If you play around most operating systems long enough, you will eventually encounter a tragic, irreversible event where your primary boot drive is damaged beyond repair. It might even be the result of malware, or some other external factor beyond your control. I've had this misfortune a couple times with MSWindows over the years. It usually takes a good deal of time and effort to reinstall the operating system just to get back to a basic working platform, not to mention that some personal documents may be lost forever after such an event. After installing Kali Linux recently, I realized it would be fairly simple to set up a process to perform regular backups of the entire boot drive. In this article I will detail the following steps.
- Create a Linux live USB drive
- Make the live USB drive persistent so you can install software on it
- Install and use Clonezilla for backup/restore of the boot drive
- Review the process of backing-up and restoring a disk drive
Writing the Linux Image to USB
The first step is to download a copy of Kali Linux, and write the live distribution image to a USB disk. The folks at kali.org have a webpage describing this process, located here. Their approach involves use of a .img Kali image, and a program called Win32DiskImager. The only problem with their approach is that Win32DiskImager only works with .img files (not the more common .iso file) , and the .img Kali image is produced in far less variety than .iso builds are. The particular build I wanted only came as a .iso file, so I had to find another program to perform the USB write. The program I chose is named Rufus, and it has a good reputation for reliability.
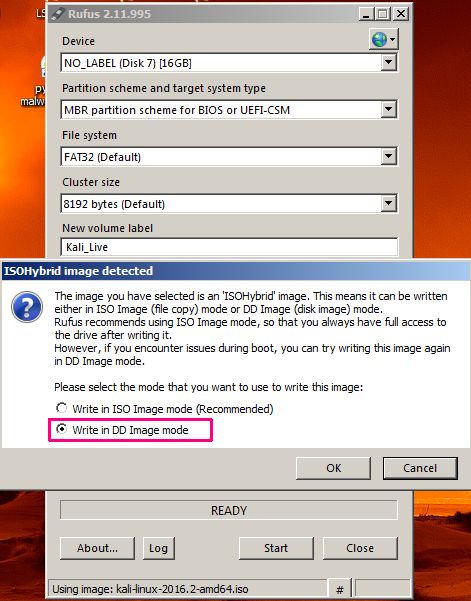
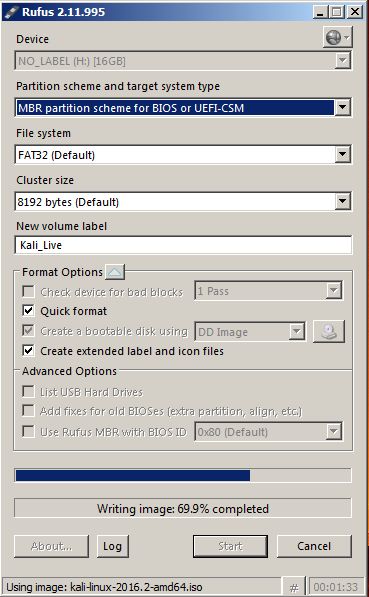
First download Kali Linux (I picked the amd64-bit build, .iso file). Picking a really recent build at this stage avoids a lengthy software update after applying persistence. I like the weekly builds here because they provide a SHA1 checksum to verify you got a good download. Next download Rufus image writer. Rufus doesn't require an installation - just run the executable. Rufus also doesn't require that you preformat the disk. It will recognize an unformatted, unlabelled USB disk and provide them in a list - just pick your USB disk by size (if you don't how big your USB drive is, then you've got other issues). You can give it a label (New Volume Label), but I left everything else as default. You need to select an image to write, using the little disk icon button (I circled this in the image). After selecting your .iso image, click Start.

Before starting, Rufus will prompt you to select an image write mode. It's important to select 'Write in DD Image Mode', or else when you boot the USB disk to perform an installation it will go into an infinite loop looking for the CD-drive (and it will never find it because this is a USB disk, not a CD). Click Ok to the next dialog which acknowledges the disk will be overwritten, then let the image writer complete the job, and then close Rufus. The resulting USB stick will be unrecognizable from MSWindows because it has a Linux ext4 partition on it.
Kali Live USB, Adding Persistence
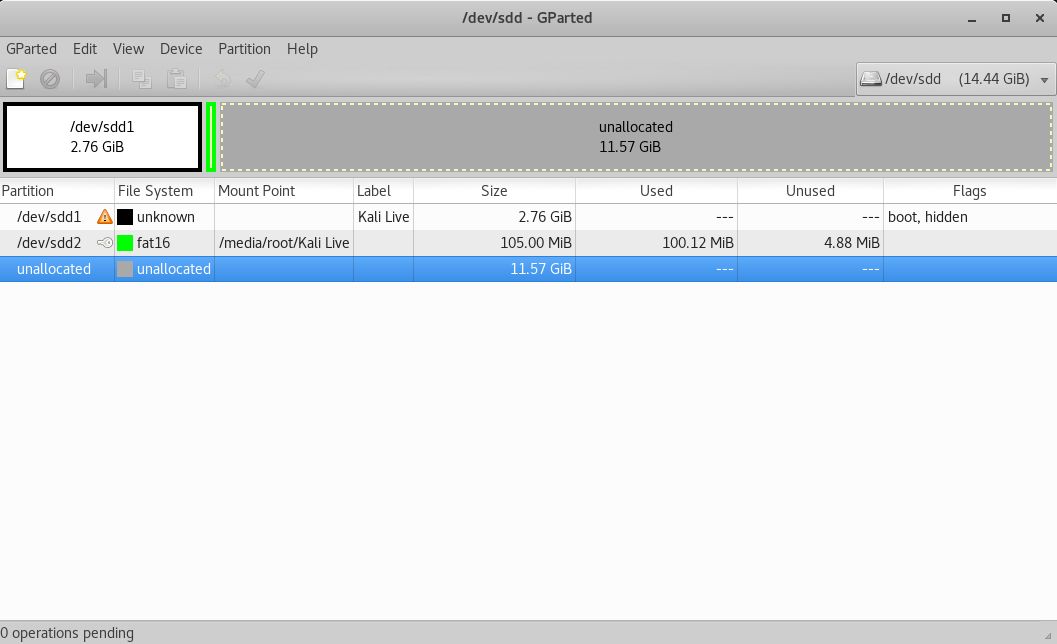
Now that you have the USB live (bootable) disk, you can boot into it from a new computer. If you haven't installed Kali Linux to a hard-drive, you should do that next, although I won't be covering that process. To add persistence to the Kali Live USB disk, first boot into a full Kali hard-drive installation and access the USB stick from there. Once again, the people at kali.org have provided instructions for doing this, located here. Instead of following those instructions exactly, I took a shortcut by just doing everything within the program gparted, which is a graphical front-end for the parted partition editor.
My copy of Kali had gparted already installed, but if yours doesn't then it's easy enough to install with the following command.
> apt-get install gparted
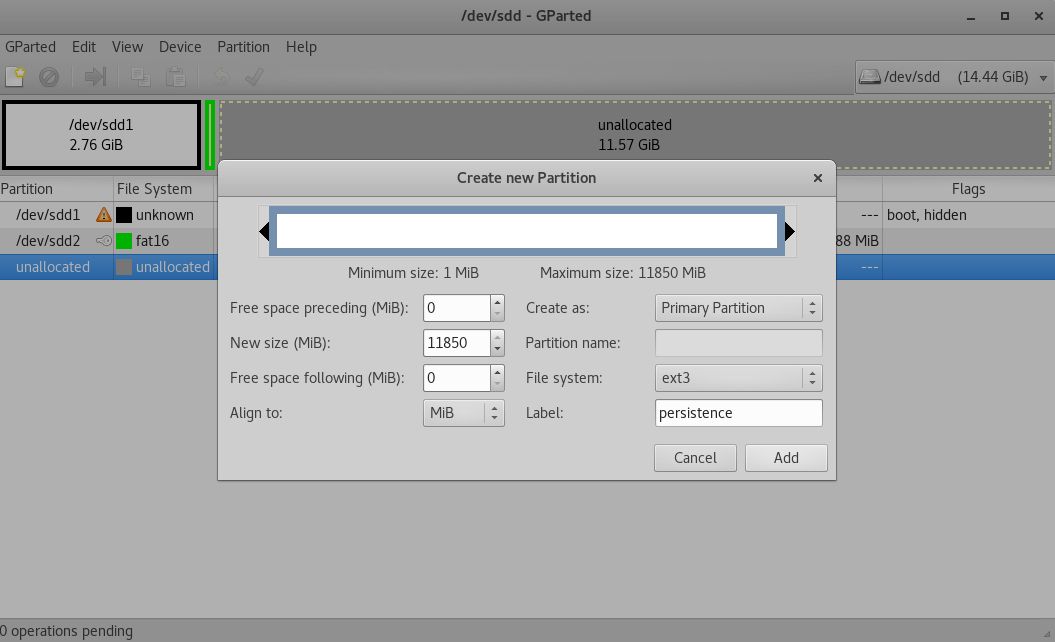
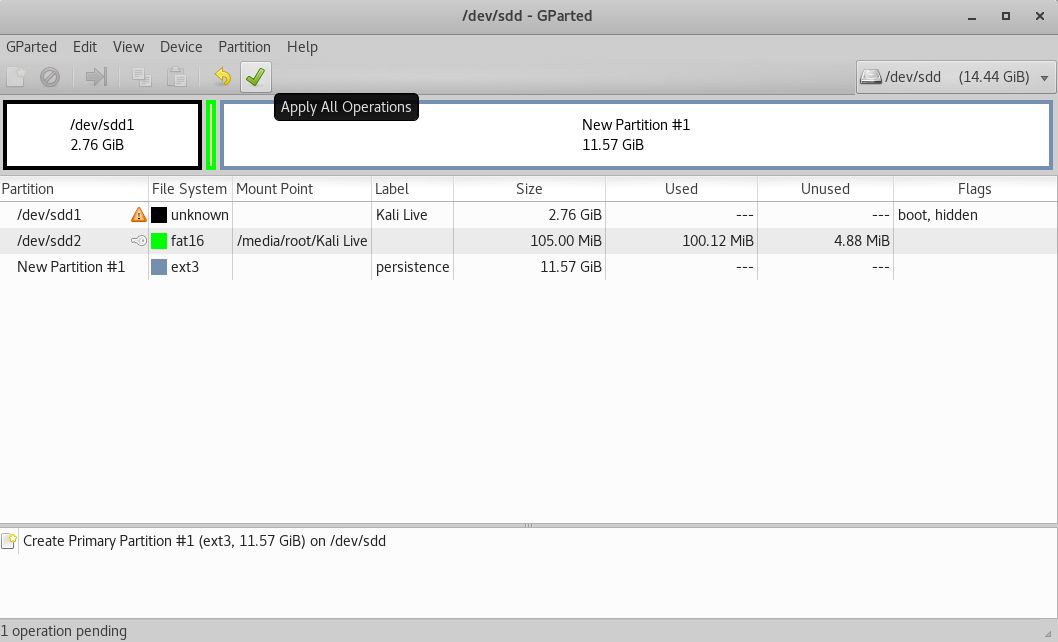
Gparted can be launched from the topbar Applications menu, under Usual applications | System tools | Administration. Once it launches you can select the USB device with the drop-down menu (upper-right corner). Right-click the Unallocated space in the USB drive, and select New. Change the filesystem type to ext3 and give it the label of 'persistence', and click Ok. Now click the green checkmark button in the menubar to apply the changes. After the new partition is created, close out of gparted.

Rather than try to fiddle with mounting the new partition, I found it easier just to reboot and let the system mount it for me. Once I reboot, the persistence partition appears as an icon on my Kali desktop, and I can open it in the file browser just by double-clicking on the icon. Once it opens in the Nautilus file browser, I right-click and open a terminal, for the purpose of creating a single file in the partition. When the terminal opens, enter the following command.
> echo "/ union" > ./persistence.conf
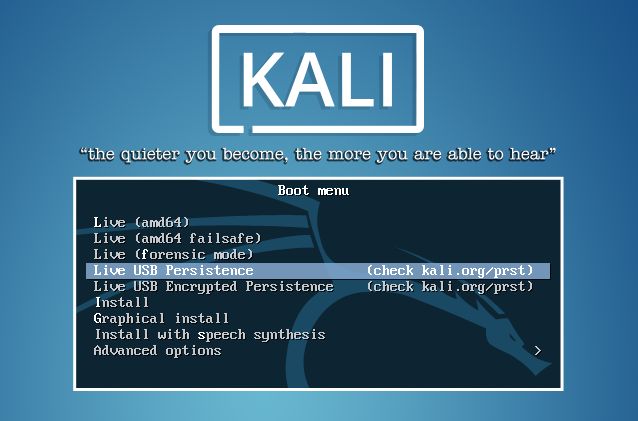
That's it. Close the terminal, close the file browser, and reboot into the Kali Live USB device. Since it now has persistence, it's now possible to install software and have it saved to the disk. To boot into the Kali Live USB disk, at your computer boot menu you should select the 2nd partition on the Live USB stick (where the GRUB menu is at), then when the GRUB menu appears select the 'Live USB with Persistence' option.
Backup-Restore Using Clonezilla
Once you are booted into your Kali Live USB Gnome3 desktop, the first task with any new system is to perform software updates, with the following commands.
> apt-get update
> apt-get upgrade
> apt-get dist-upgrade
> apt-get autoremove
If you chose a recent build of Kali, then this step will be a very short process (less than 5 minutes). Clonezilla is an easy installation, with this next command.
> apt-get install clonezilla
I have a couple platter-based Western Digital Velociraptors installed in this computer, so my plan was to store the backup images on one of these. In my experience with disk-drive calamities, the tragedy always occurs with boot drives, and essentially never happens to secondary storage drives.
Performing the Backup
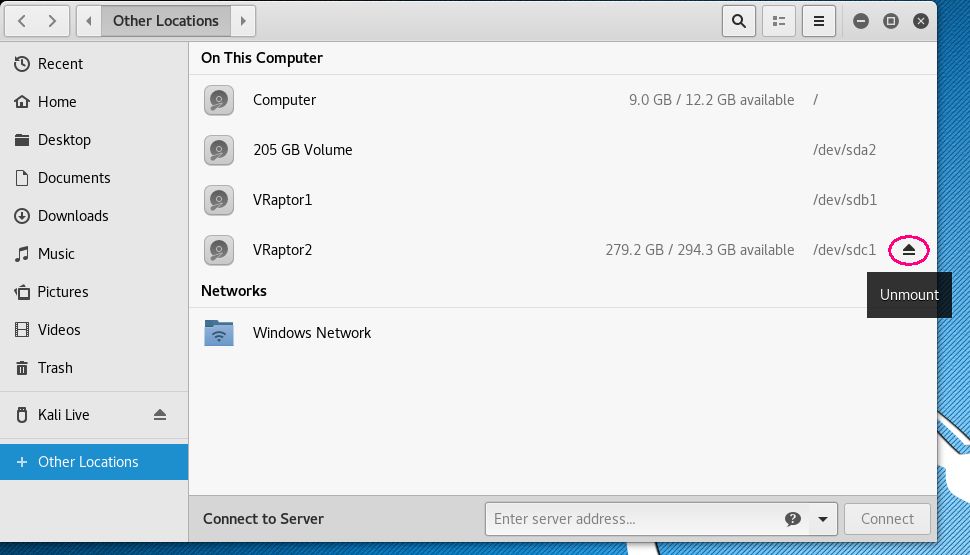
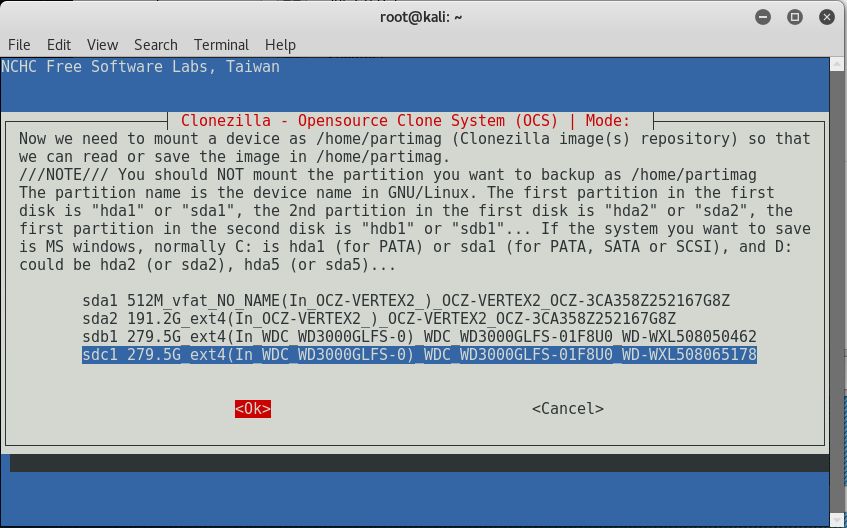
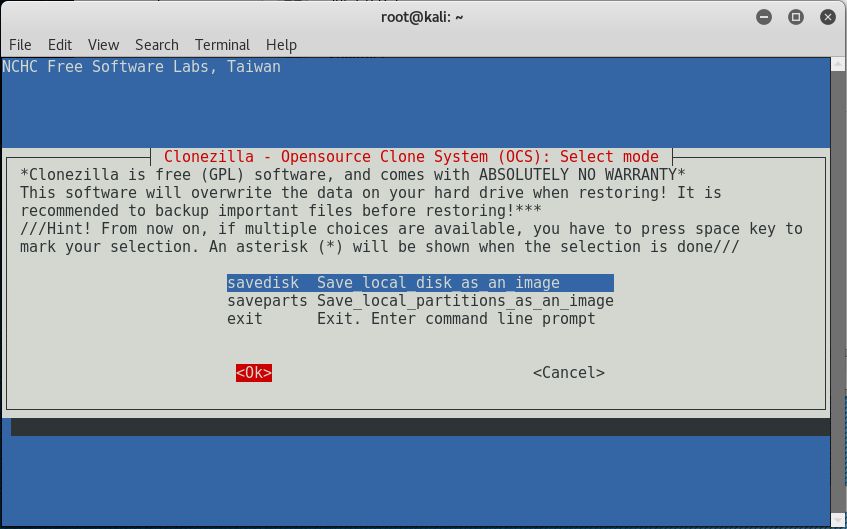
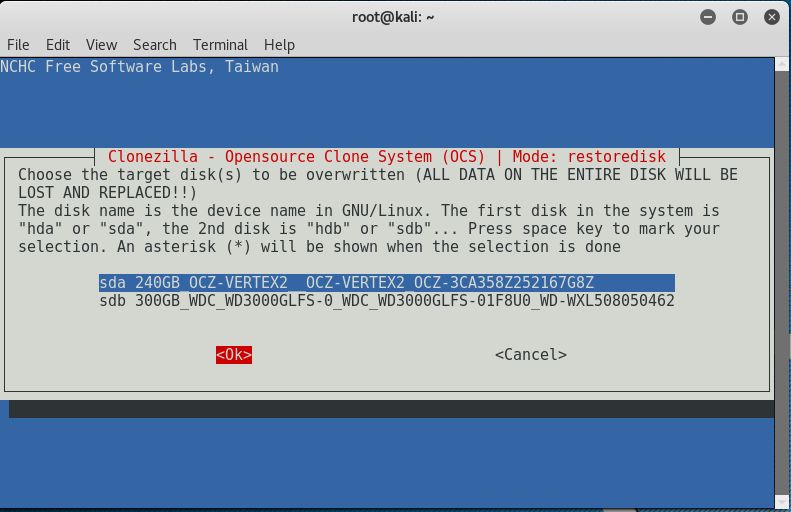
Clonezilla is a text-based program (using a development library called ncurses), so you launch it from a terminal just by typing its name 'clonezilla', and navigate around using tabs, arrows, and the space key. This is a very easy program to use, so I won't go through a lot of detail here. Of course we're cloning from disk to an image file, and you select the disk you wish to image as well as a save location. For nearly every option I was choosing the default, so for me this process was a sequence of enter keys. At one point Clonezilla needs to identify the likely places to store the backup, and if one of your drives is not being recognized, then you have to make sure to dismount them (see next image).
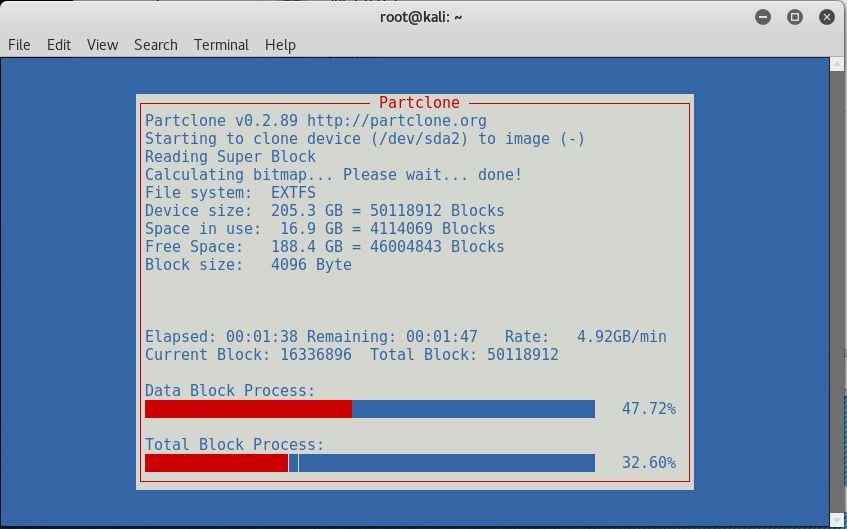
The actual backup went very quickly. On a 205 Gigabyte SSD with 17 Gigabyte being used, it took just under 4 minutes, and the resulting set of backup files comprised about 6.5 Gigabyte of data. During the process, Clonezilla mounted the volume where data was to be saved, at the following location.
/home/partimag/backupname
Afte completion I unmounted this using GParted, and the disk volume was immediately viewable in Nautilus, containing the backup folder with all its data. I performed a full-disk backup, so all partitions on the disk were saved, however it is possible to perform the backup on a single partition. Clonezilla also offered to check the data to determine if a restore could be performed, and this was successful. I also learned during this process that I can back up a MSWindows system just as easily, although I haven't tried this.

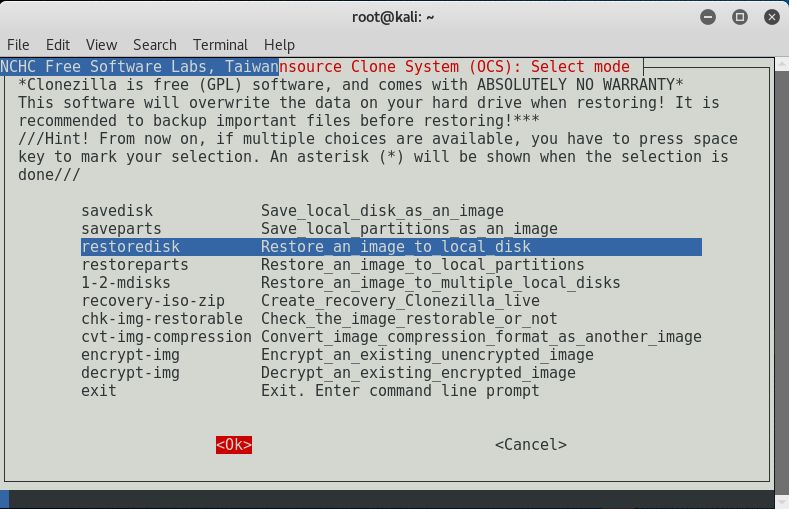
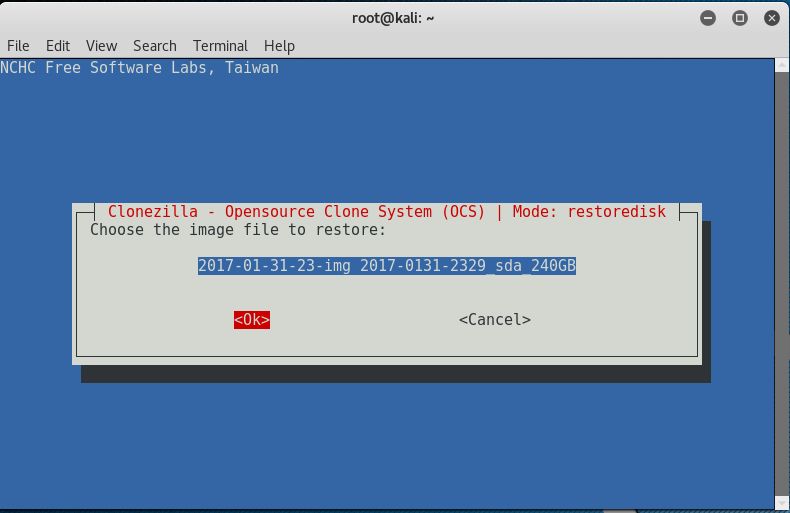
Restoring Backed-Up Data to Disk
This procedure wouldn't be complete without testing to see if I could restore from the saved data, and successfully boot into the restored disk. Booted into the Kali Live USB environment, I used GParted to delete all partitions on the disk that I had backed up. Next I used Clonezilla to restore the disk partitions using the backed up data. I then rebooted into the SSD which had just been restored, and this all occurred without any errors. At this point I'm satisfied that my Kali Live USB with persistence can be used to recover from boot drive disaster.
-R. Foreman